Table of Contents
- Quick Answer: Best Press-On Nails for Beginners
- Comparison Table Overview
- Key Differences
- Top Product Picks
- The Best Press-On Nails for Beginners: In short
- Beginner Press-On Nails: At a Glance
- Key Differences to Know
- Our Top Press-On Nails for Beginners in 2026
- How to Choose the Right Press-On Nails for You
- Common Mistakes Beginners Make (And How to Avoid Them)
- Quick Questions
- Final Verdict: The Best Press-On for Your First Manicure
- FAQ
A flawless manicure can make you feel polished and put-together, but weekly salon visits are a significant drain on both time and money. For years, the alternative was messy at-home polish or flimsy fake nails that rarely lasted a day. Enter the new generation of press-on nails—a revolutionary solution that offers salon-quality looks with surprising durability, all from the comfort of your home.
If you’re new to the world of press-ons, the sheer number of options can be overwhelming. This guide is designed to cut through the noise. We’ve evaluated the top kits of 2026 to find the absolute best press-on nails for beginners, focusing on foolproof application, wear time, and overall value.
Quick Answer: Best Press-On Nails for Beginners
The best press-on nails for beginners are easy-to-apply sets with strong adhesion and flexible materials. Pre-glued options like KISS imPRESS are ideal for first-time users, while soft gel systems offer longer-lasting results.
In short:
- Best overall: KISS imPRESS Press-On Nails
- Best for Salon-Quality Finish: BTArtboxnails XCOATTIPS
- Best for Practicing Application: Beetles French Tip Press-On Nails
Comparison Table Overview
| Product | Best For | Key Strength | Price Note | Editor Note |
|---|---|---|---|---|
| KISS imPRESS Press-On Nails | Absolute Beginners | Pre-applied adhesive | $ | The fastest and most foolproof application. Perfect for a first-timer or a special event. |
| BTArtboxnails XCOATTIPS | Salon-Quality Finish | Durable soft gel material | $$$ | A step-up option for those wanting to try a UV-cured system for maximum longevity. |
| Beetles French Tip Press-On Nails | Practicing Application | High quantity (150 pcs) | $$ | An excellent value pack for learning how to apply gel tips without breaking the bank. |
| Vansiho Deep French Gel Nail Tips | Budget Gel Kits | Pre-sanded interior | $ | Simplifies the gel prep process by having a pre-etched surface for better adhesion. |
| Vansiho French Gel Nail Tips – Long Square | Trying Longer Shapes | Affordable price point | $ | A low-risk way to experiment with a more dramatic, long square nail shape. |
| Vansiho French Gel Nail Tips – Medium Almond | Classic, Elegant Shapes | Popular almond shape | $ | Provides a timeless and flattering almond shape that suits most hands, at a great price. |
| Hkanlre Square French Press on Nails | Instant Nail Art | Pre-decorated designs | $ | The easiest way to get a fun, decorated manicure for a weekend or event with zero artistic skill required. |
Key Differences
- KISS imPRESS Press-On Nails: Pre-applied adhesive + The fastest and most foolproof application. Perfect for a first-timer or a special event.
- BTArtboxnails XCOATTIPS: Durable soft gel material + A step-up option for those wanting to try a UV-cured system for maximum longevity.
- Beetles French Tip Press-On Nails: High quantity (150 pcs) + An excellent value pack for learning how to apply gel tips without breaking the bank.
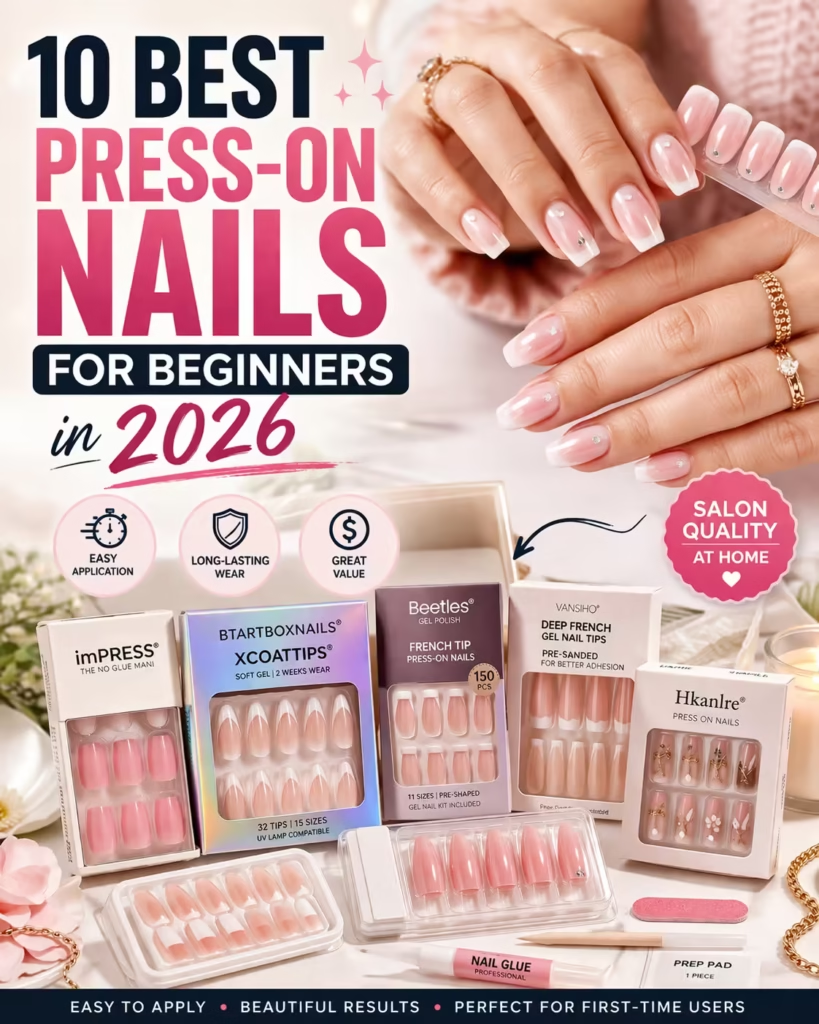
Top Product Picks
Here are the best beginner-friendly press-on nails based on ease of use, durability, and overall value:
[nailly_review_products]
The Best Press-On Nails for Beginners: In short
- Best Overall: KISS imPRESS Press-On Nails
- Best for Salon-Quality Finish: BTArtboxnails XCOATTIPS
- Best for Practicing Application: Beetles French Tip Press-On Nails
- Best for Instant Nail Art: Hkanlre Square French Press on Nails
- Best Budget Gel Kit: Vansiho Deep French Gel Nail Tips
Beginner Press-On Nails: At a Glance
Here’s a quick comparison of our top picks, focusing on the factors that matter most to a first-time user.
Key Differences to Know
When choosing your first set, the main decision is between instant application and long-term wear. Here’s the breakdown:
- Pre-Glued Adhesive Tabs: The easiest and fastest method. Products like KISS imPRESS have the adhesive already on the nail. You just peel and stick. This is perfect for a special event or a week of wear, but it’s the least durable option.
- Glue-On / Gel Cure Systems: These require a separate adhesive—either traditional nail glue or a gel glue that must be cured under a UV/LED lamp. Kits from BTArtboxnails and Beetles use this method. The application takes more time and care, but the reward is a much stronger bond that can last for two weeks or more, closely mimicking a salon gel manicure.
Our Top Press-On Nails for Beginners in 2026
Below are the detailed reviews of the press-on nail kits that stand out for their ease of use, quality, and beginner-friendly features.
How to Choose the Right Press-On Nails for You
Adhesive Types Explained
Your choice of adhesive dictates both the application process and the longevity of your manicure. For beginners, there are three main types:
- Pre-Applied Adhesive Tabs: These are the most user-friendly. The adhesive is a sticky, double-sided tab already fixed to the press-on nail. There’s no mess, no drying time, and removal is gentle. It’s the ideal starting point.
- Nail Glue: A small bottle of liquid adhesive, similar to super glue but formulated for nails. It creates a stronger, more durable bond than tabs but requires a steady hand to avoid getting glue on your skin.
- UV-Cured Gel Glue: This is the most advanced option, used with soft gel tips. The gel glue is applied to the nail, which is then pressed onto your natural nail and held in place while curing under an LED lamp for about 60 seconds. It offers the longest wear time and a professional finish.
Material Matters: ABS Plastic vs. Soft Gel
The material of the press-on nail itself affects its look, feel, and durability.
- ABS Plastic: This is a common, rigid material used in many traditional press-on kits. It’s sturdy and holds its shape well, making it great for pre-designed art. However, it can feel less natural and may not conform as perfectly to curved nail beds.
- Soft Gel: This is a more modern, flexible material that mimics the feel of a salon gel extension. It’s more pliable, allowing it to fit snugly against the cuticle for a seamless, natural look. Soft gel tips are also designed to be soaked off with acetone, just like a salon manicure.
Finding Your Perfect Shape & Length
Starting with a shorter, more manageable length is wise. A short squoval (square-oval) or almond shape is practical for daily activities and less likely to catch or lift. As you get more comfortable, you can experiment with longer coffin or stiletto shapes. Always choose a kit with multiple sizes to ensure you can find a perfect fit for each finger.
The Importance of Nail Prep
No matter which kit you choose, success lies in the prep work. This is the single most important step for ensuring your press-ons last. A good kit will include a prep pad (or you can use rubbing alcohol), a cuticle stick, and a small file. Pushing back cuticles, lightly buffing the nail surface, and cleaning the nail of any oils creates the perfect canvas for the adhesive to grip.
Common Mistakes Beginners Make (And How to Avoid Them)
- Skipping Nail Prep: The number one mistake. Always clean your nails with an alcohol wipe and gently buff the surface. This removes oils and gives the adhesive something to grip, dramatically increasing wear time.
- Using the Wrong Size: A nail that is too wide will press against your skin, breaking the seal and causing lifting. A nail that is too narrow will leave gaps and look unnatural. Always size each nail first; if you’re between sizes, choose the slightly smaller one and gently file the sides if needed.
- Applying Too Much Glue: With liquid or gel glue, a little goes a long way. A single, even drop is enough. Too much will seep out the sides, creating a mess and a weak bond.
- Incorrect Removal: Never, ever peel or pry off your press-ons. This rips away layers of your natural nail. The correct method is to soak your fingertips in warm, soapy water with a few drops of cuticle oil for 10-15 minutes until the adhesive loosens, then gently lift them off.
Quick Questions
Question: What’s the easiest type of press-on nail to apply?
Answer: Press-on nails with pre-applied adhesive tabs, like the KISS imPRESS nails, are the easiest for beginners as they require no separate glue.
Question: How long do beginner press-on nails last?
Answer: Longevity varies. Simple adhesive tabs may last 3-7 days, while properly applied glue-on or gel-cured nails can last for over two weeks.
Question: Are press-on nails damaging to your natural nails?
Answer: When applied and removed correctly, press-on nails are not damaging. Damage typically occurs from improper, forceful removal.
Final Verdict: The Best Press-On for Your First Manicure
Navigating the world of press-on nails is simple once you know what to look for. Your ideal first set depends entirely on your goals for ease, longevity, and style.
- For the absolute beginner who wants zero fuss: The KISS imPRESS Press-On Nails are the undisputed champion. The pre-applied adhesive removes all guesswork and mess, delivering a beautiful manicure in under 10 minutes. It’s the perfect entry point.
- For the beginner ready for a longer-lasting gel system: The BTArtboxnails XCOATTIPS offer a premium, salon-like experience. While they require a UV lamp and more careful application, the result is a durable, professional-looking manicure that lasts for weeks.
- For the budget-conscious beginner who wants to practice: Beetles and Vansiho provide incredible value. Their large-quantity packs of soft gel tips are perfect for honing your application skills without the fear of wasting expensive nails.
FAQ
How can I make my press-on nails last longer?
Longevity comes down to three key steps. First, meticulous nail prep: dehydrate the nail plate with rubbing alcohol and gently buff the surface. Second, proper application: use the correct amount of glue to cover the nail without seepage and press firmly for at least 30 seconds. Third, aftercare: avoid prolonged water exposure for the first few hours and be mindful of using your nails as tools.
Can I reuse press-on nails?
It depends on the type. Standard glue-on nails can often be reused if you carefully file away the old, dried glue from the back. Soft gel nails that are soaked off are generally not reusable. Nails with pre-applied adhesive tabs are for single use, but you can apply new adhesive tabs or nail glue to reuse the nail itself.
What’s the difference between ABS plastic and soft gel press-ons?
ABS plastic is a rigid, durable material that’s great for holding intricate shapes and designs, but it can feel less natural. Soft gel is a flexible, modern material that conforms more closely to your natural nail shape for a seamless look. It feels lighter and is designed to be soaked off with acetone, much like a salon gel manicure.
How do I safely remove press-on nails?
Patience is key. Never pry or pull them off. For standard glue or adhesive tabs, soak your fingers in a bowl of warm, soapy water with a bit of oil for 10-15 minutes to loosen the bond. For soft gel tips, you’ll need to file the top surface to break the seal and then soak them in an acetone-based remover until they soften and can be gently scraped away.
Do I need to buy a UV lamp for press-on nails?
Only if you are using a soft gel system with a UV-curable gel adhesive, such as the kits from BTArtboxnails, Beetles, or Vansiho. Traditional press-on nails that use standard liquid nail glue or pre-applied adhesive tabs do not require a lamp.